Laser Engraving Leather: Settings, Materials and Machine Guide
Laser engraving leather uses controlled heat to darken or remove part of the surface, leaving text, logos or artwork. Reliable results start with documented, laser-compatible material, followed by a small test of power, speed and line spacing. CO₂ and blue diode machines can suit different leather jobs; the finish and backing need checking first.
A name on a wallet should remain readable when the leather bends. A patch needs an edge that can be handled and stitched. Use those requirements to judge the sample after engraving and cleanup. When comparing a Good-Laser engraving machine, bring the actual blank and the finished result you want into the discussion.
Which leather can you laser engrave?
Start with vegetable-tanned leather whose supplier has confirmed suitability for laser processing, or a documented laser-compatible synthetic. A label such as “genuine leather” or “vegan leather” does not identify all the finishes, adhesives and backing materials that the beam will reach.
| Material | What to establish before testing | Practical decision |
|---|---|---|
| Vegetable-tanned leather | Tannage, finish, dye and any backing; supplier approval for laser use | A useful starting material once those details are confirmed. Check contrast and flexibility on an offcut. |
| Dyed or coated natural leather | The surface treatment and its laser compatibility | Test the exact colour and finish. Approval for an unfinished hide does not cover every coating. |
| Chrome-tanned leather | Specialist material and emissions assessment | Exclude it from a routine workshop workflow; choose a documented alternative. |
| PU leatherette made for laser processing | PVC-free composition, backing and compatibility with the intended laser source | Use the supplier's process guidance. “PU” alone is insufficient evidence. |
| PVC, vinyl or an unidentified synthetic | Reliable identification of the complete material | Do not process PVC or vinyl. Keep unidentified stock out of the machine. |
The University of Maryland's laser material guidance identifies toxic-fume concerns with chrome-tanned leather and prohibits PVC. Use supplier documentation to identify a material; its colour, smell or feel cannot establish laser compatibility.
Even a suitable leather produces smoke during processing. Run the extraction system specified for the machine and material, keep the enclosure and interlocks operating, and attend the job throughout. An enclosure does not make an unknown material acceptable.
Leather laser engraving settings: what to adjust first
Begin with the machine or material supplier's approved starting settings for your exact configuration. A power percentage from a different laser is not a transferable recipe: source power, optics, controller behaviour and material response all affect the mark. If no approved starting point exists, request a sample test before running customer stock.
For shallow engraving, excessive energy can make the leather brittle or leave loose char. Work toward the lowest exposure that produces an acceptable mark after cleaning. Evaluate a name, a thin line and a small filled area together; a solid test square can hide problems with fine lettering.
| Control | What it changes | How to test it |
|---|---|---|
| Power | Energy delivered while the beam is on | Within the approved range, vary power while holding speed and other settings steady. Stop if the surface deteriorates. |
| Speed | Time spent over a given distance | Compare nearby speeds at fixed power. Confirm whether the software uses mm/s or mm/min. |
| Line interval / resolution | Spacing between raster passes and the overlap of adjacent lines | Use a moderate supplier-recommended interval first. Increase density only if detail improves without excess heat. |
| Pass count | Repeated exposure of the same area | Assess one pass first. A second pass can add damage as well as depth. |
| Focus | Spot size at the leather surface | Focus on the surface being engraved. Keep the blank flat and refocus when its height changes. |
| Air assist and extraction | Conditions at the processing point and removal of smoke | Follow the machine's leather guidance and hold the setup constant during comparisons. |
Resolution settings are easy to misread. If software expresses raster spacing as lines per inch, the conversion is line interval in mm = 25.4 ÷ LPI. For example, 254 LPI corresponds to 0.10 mm. That is a unit conversion, not a recommended leather setting. Smaller spacing creates more scan lines over the same area, which can increase heat exposure.
Build a test you can repeat
- Use an offcut from the same batch as the finished blanks. Record its thickness, colour, finish and supplier reference.
- Prepare a compact file with the smallest text in the order, a fine outline and a filled shape. Leave room between samples.
- Choose three power levels and three speeds within the supplier-approved test range. Keep focus, line spacing, air assist and pass count fixed.
- Run a preliminary sample at the low-exposure end first. Continue the nine-cell grid only if that sample behaves normally.
- After cooling, clean each sample using a method approved for that finish. Compare legibility, loose residue and surface damage.
- Flex the material as the finished product will be flexed. Confirm the chosen settings on another offcut before starting the order.
Keep the winning sample beside its settings record. Include the machine configuration and lens, artwork size, units, power, speed, line interval, passes and cleaning method. Retest when the leather batch or finish changes. Use the saved preset as a starting point when testing the next hide.
Prepare leather artwork and position the blank
Simple artwork usually makes the first test easier to judge. Use vector outlines for cut paths and raster or filled artwork for areas that should be engraved. Check the file at the final size: text that looks clear on a monitor may close up when reduced to a small patch.
For photographs, preview the image in grayscale and simplify muddy shadows before processing. Test the actual crop on the chosen leather. Grain and an uneven surface can compete with fine image detail, so adding resolution will not necessarily make a portrait clearer.
Flatten the blank with a fixture compatible with the machine and keep clamps out of the beam path. On a finished wallet or notebook, seams and folded layers change the surface height. Position and focus for the area being marked, and check that hardware cannot collide with the head.
Run the machine's framing or positioning function before engraving. For repeated orders, use a jig with a consistent locating edge and check the first piece after every reload. Camera positioning can help place artwork, but the production sample still needs inspection.
Engraving and cutting need separate tests
Engraving changes the surface; cutting separates the material through its thickness. A setting that gives a readable logo says little about whether a cut edge will be acceptable. Test cut quality separately, including the back of the piece and any stitching holes.
Where both operations share a setup, engraving before the final outline cut helps keep the piece located. Once a part is cut free, it can shift. Small holes and narrow bridges deserve particular attention because a visually neat result may still be too fragile for stitching or repeated use.
Agree on the edge finish before production. Some leather products tolerate a dark cut edge; others need further finishing or a different cutting method. Judge the time spent cleaning and finishing alongside the machine time when costing a batch.
Choosing a Good-Laser machine for leather work
Choose around the largest blank, the amount of cutting and the production workflow. A studio engraving individual names has different needs from a workshop nesting patches across a sheet. Good-Laser's product pages list leather applications for the models below, but finished samples should decide whether a configuration suits your order.
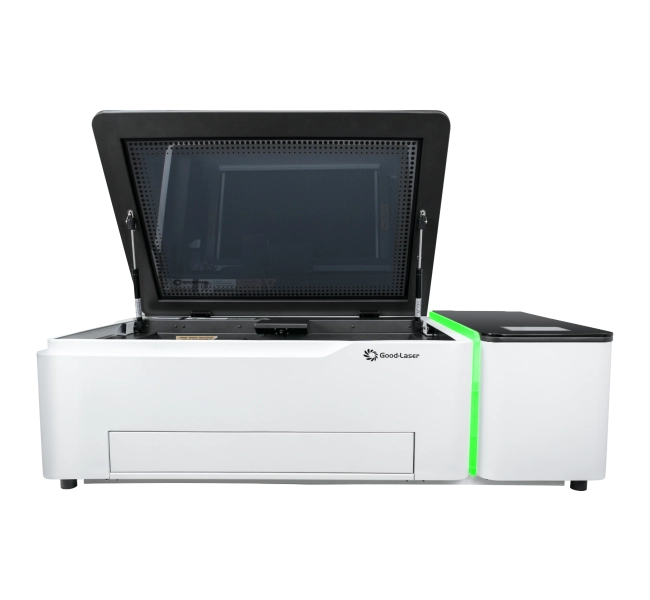
Light 530 for desktop CO₂ work
The Light 530 belongs to Good-Laser's desktop laser engraver range. It is a practical model to evaluate when a workshop needs leather personalization alongside other compatible craft materials. Check whether the usable area accommodates the blank and fixture together, and ask for both an engraved sample and a cut sample if your work requires both operations.
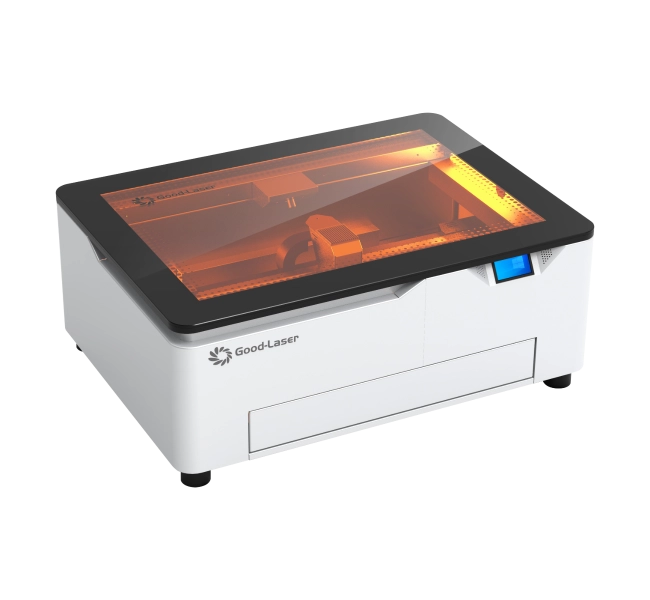
Light Blue 530 for diode-based personalization
The Light Blue 530 is a blue laser engraver with leather among its published application materials. It is worth comparing for detailed personalization on documented compatible stock. Ask for tests on every colour or finish you plan to sell; a successful result on one blank does not establish the same contrast or processing time on another.
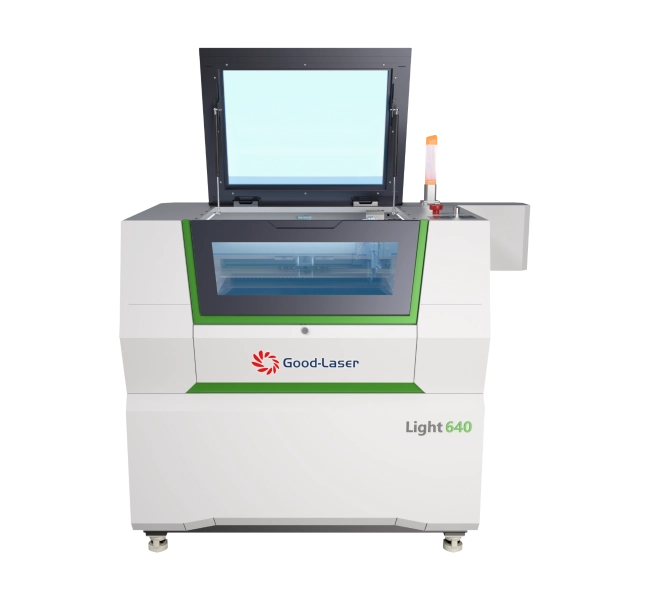
Light 640 for a workshop cutting and engraving workflow
For a workshop comparing commercial laser cutting and engraving machines, include the CO₂ Light 640 in the sample discussion. Its product page lists leather among the supported non-metal applications. Compare loading, positioning, processing and cleanup time on a representative job, then confirm the working area and power configuration in the quotation.
For all three models, request a result that matches the work you intend to deliver. A photograph of a dark logo cannot show how the leather feels, whether it sheds residue or how it bends. Those checks are especially useful for wallets, patches and straps.
Fix common leather engraving problems
| Problem | Check first | Next test |
|---|---|---|
| Black residue rubs off | Whether the mark is charred and whether cleanup suits the finish | Reduce exposure within the approved range and assess the mark after cleaning. |
| Text looks soft or uneven | Surface height, focus, artwork size and blank movement | Flatten and refocus; compare a slightly larger text sample before adding power. |
| The mark is too faint | Material colour, coating, correct focus and cleanliness of optics | Change one exposure variable at a time. Some colour and finish combinations offer limited contrast. |
| Leather becomes stiff or cracks | Depth, repeated passes and excessive raster overlap | Try a shallower mark with less exposure, then repeat the flex check. |
| A cut is uneven around the outline | Flatness, thickness variation, focus and whether the piece moved | Correct the setup before increasing cutting exposure. |
| A batch varies in appearance | Hide variation, finish, thickness and consistent loading | Compare pieces against an approved sample and separate materially different stock for retesting. |
Clean gently and test the cleaning method on spare material first. Aggressive rubbing can spread residue into the grain; water or solvents may alter a finish. Avoid treating wetting, masking or sealing as universal fixes. Each adds another variable that needs approval for the exact leather.
When repeatability is still uncertain, use Good-Laser's sample testing service to discuss the blank and target result before committing to a machine or a batch. Include a rejected sample if it shows the problem clearly.
Frequently asked questions
What are the best laser engraving settings for leather?
The best settings produce the required appearance without unacceptable residue or damage on your specific leather. Start from supplier-approved settings for the machine and material, then compare power and speed while holding other controls fixed. Choose the result after cleaning and flexing the sample, rather than judging its colour straight out of the machine.
Can a diode laser engrave leather?
A blue diode machine can engrave compatible leather; Good-Laser lists leather on its Light Blue 530 product page. Confirm the full material composition and test the exact colour and finish. Compatibility and processing time can differ between blanks, and settings from a CO₂ machine should not be copied into a diode workflow.
Can you laser engrave faux leather?
Use only a documented laser-compatible synthetic whose complete composition, including backing, is known. Some PU leatherettes are made for laser processing. PVC-based products must stay out of the laser, and a “vegan leather” label does not establish compatibility. Obtain the supplier's material information before conducting any engraving test.
Should leather be wet before engraving?
Do not assume that wetting is required. Moisture can change the appearance and behaviour of the blank, and the finish may react badly. Follow the material supplier's guidance. If an approved process includes moisture conditioning, keep it consistent and evaluate it on spare stock before applying it to customer items.
Why does engraved leather rub off on my hand?
Loose residue can remain on a heavily heated surface. Check the cleaning procedure and compare a lower-exposure sample. If cleaning removes nearly all the apparent contrast, assess whether another material or finish would give a better result. Adding a coating should not replace finding a stable engraving process.
Is CO₂ or diode better for a leather business?
Compare them using your actual jobs. Include the largest blank, smallest lettering and any cutting operation, then inspect edge quality, flexibility and cleanup requirements. Throughput also includes loading and finishing. Ask the supplier to run a representative sample job on each configuration you are considering.
Plan your leather engraving setup with Good-Laser
Send Good-Laser the leather specification, thickness, blank dimensions and artwork, along with the number of pieces you expect to produce. Include a reference for the desired contrast and say whether you also need cutting. Discuss your leather engraving project with Good-Laser to request a suitable machine recommendation and sample-test plan.