How Does Laser Engraving Work? A Practical Process Guide
Laser engraving works by focusing a controlled laser beam onto a material while software directs the pattern. The absorbed energy removes material to create a recessed design. Depending on the material and settings, a laser can also produce surface contrast without significant depth. The right process depends on the finish you need.
What Happens When the Laser Hits the Surface?
The laser source generates light, and an optical system concentrates it into a small spot. Where the material absorbs enough energy, the surface changes. Engraving removes material locally; other marking processes can change color, texture or a coating without creating the same recessed result.
Material removal can involve melting and evaporation. As TRUMPF explains in its laser engraving overview, the interaction can leave a depression and a different surface structure. This is why a dark mark does not automatically prove that an object has been deeply engraved: contrast and depth describe different aspects of the result.
The beam does not work like a rotating cutter that presses against the part. However, the process still requires stable positioning, correct focus and control of heat. A detailed design cannot compensate for an uneven surface or an unsuitable material.
How a Digital Design Becomes an Engraving
The machine needs both a pattern and processing instructions. The artwork defines where the laser should act; the job settings determine how it acts at each location.
1. Prepare the artwork
Set the design to its final physical size and check text, outlines and image quality. A photograph may need contrast adjustment or dithering, while a logo may work better as clean vector artwork. Keep engraving and cutting operations separate so an outline is not accidentally processed as a through-cut.
Good-Laser provides laser cutter software resources, including LightMaker. Its software page lists image and vector formats such as JPG, PNG, SVG and DXF. Confirm the software and supported workflow for your exact model and controller rather than assuming every machine uses the same interface.
2. Position and focus the part
Secure the blank so it cannot shift. Set focus according to the machine instructions and check the job boundary before processing. For repeated work, a locating fixture can help place each blank consistently. Curved objects require a compatible handling arrangement; a flat-bed setup does not automatically maintain focus around a cylinder.
3. Run a material test
Begin with the manufacturer's guidance and test on a spare piece from the same material batch. Change one variable at a time and compare edge clarity, contrast, depth and residue. Keep the successful settings together with the material description, focus method and artwork version.
4. Engrave and inspect
The controller coordinates laser output with motion or beam steering. After processing, follow the approved cleaning procedure and inspect the finished result. Check small lettering, uniformity and positioning, not just whether the design is visible. For identification codes, include a readability check appropriate to the application.
Raster Engraving vs. Vector Engraving
Raster engraving fills an area using successive scan lines or programmed fill paths. Vector engraving follows outlines. The choice depends on the design and the software workflow.
| Method | How the pattern is processed | Typical design | What to check |
|---|---|---|---|
| Raster or filled engraving | The machine processes an area line by line or with a fill pattern | Photos, filled lettering and solid logos | Image preparation, line spacing and consistent fill |
| Vector engraving or scoring | The beam follows defined lines and curves | Outlines, line drawings and decorative borders | Duplicate paths, line intersections and depth |
An outline file can be scored or cut depending on the processing settings. File type alone does not determine the operation. Review the assigned mode before starting a job.
Diode, CO₂ and Fiber Lasers: Why the Source Matters
Laser sources interact differently with materials. Choosing a machine starts with the substrate and required result, rather than a power rating alone. The following Good-Laser products illustrate three categories to evaluate.
Diode engraving for compatible craft materials
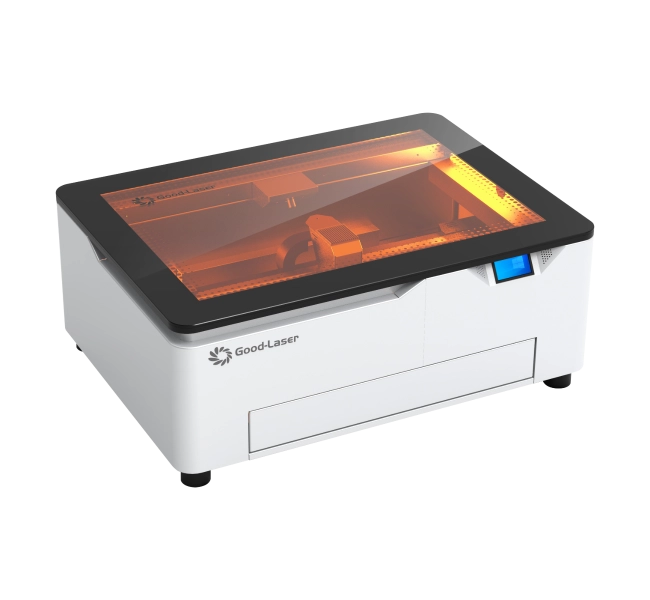
A diode platform is an option for personalized designs on compatible craft blanks. The Light Blue 530 diode laser engraver belongs to this category. For wood projects, test the actual species, finish and grain: similar-looking blanks can produce different contrast and surface texture.
CO₂ engraving for non-metal projects
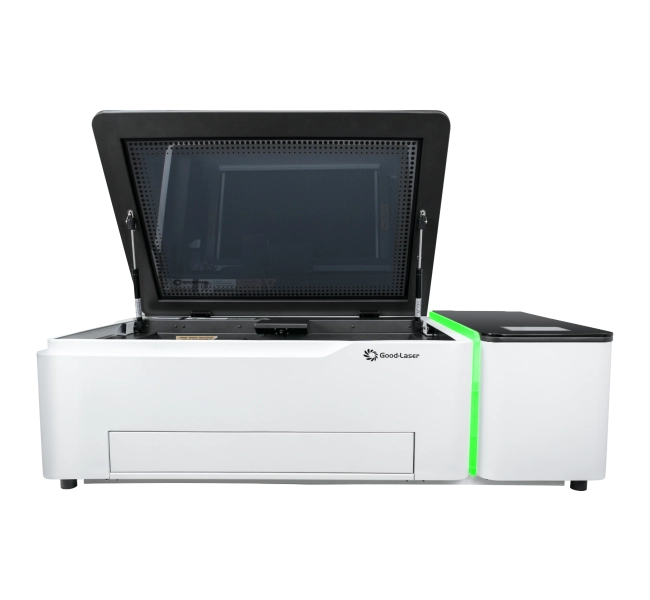
A CO₂ platform is a relevant category for wood, acrylic and other approved non-metal jobs. The Light 530 desktop laser cutter and engraver is a compact product option to investigate. An engraving task needs a surface result, while a cutting task needs separation through the material; test these operations independently.
Fiber engraving and marking for compatible metals
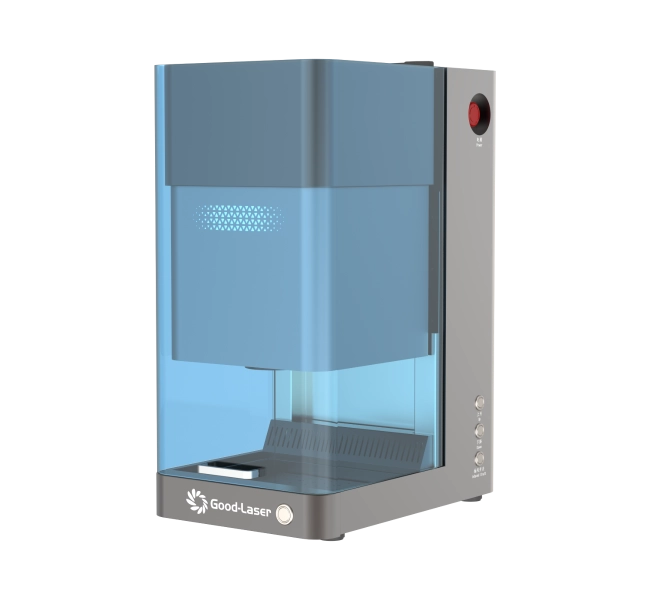
For metal identification, logos and other suitable marking tasks, evaluate the Mark M20 fiber laser engraver. Specify the alloy, coating and desired depth or contrast. Request confirmation of the source, lens and configuration needed for that result. A fiber marking platform should not be treated as a sheet-metal cutting machine.
Which Settings Affect the Engraving Result?
Settings control the energy delivered and how it is distributed. There is no single setting that works for every material, laser source and artwork.
| Setting or condition | Effect to evaluate |
|---|---|
| Power and speed | Balance surface interaction with processing time; excess exposure can damage the finish |
| Focus | Affects spot size and detail; follow the approved focal-distance procedure |
| Line spacing or fill interval | Controls coverage and overlap; excessively dense processing can add heat without useful detail |
| Pass count | Can build depth, but also changes cycle time, heat and residue |
| Pulse settings, where supported | Change the interaction on a pulsed system; settings depend on the source and controller |
| Material condition | Coatings, grain, surface preparation and batch variation influence the result |
If an engraving is faint, first verify focus, material compatibility and the assigned job mode. If detail looks blurred or scorched, inspect positioning, artwork resolution and exposure. Avoid increasing power repeatedly without identifying the cause.
Engraving, Marking, Etching and Cutting Compared
These terms describe different outcomes, although suppliers sometimes use them broadly. State the required result when discussing a job.
| Process | Desired outcome | Example requirement |
|---|---|---|
| Engraving | Material removal that creates a recessed feature | A logo with a specified depth |
| Marking | Identification or contrast; may involve removal or another surface change | A readable serial number |
| Etching | A surface effect whose technical meaning depends on the process | A specified texture and contrast demonstrated on a sample |
| Cutting | Separation through the material | A cut-out shape with acceptable edge quality |
A deep mark is not automatically the best choice. A part may need readable contrast, minimal surface alteration or resistance to a later finishing operation. Evaluate the finished part under its intended conditions.
Plan Material Handling and Extraction Before Starting
Use identified, supplier-approved materials and follow the machine's operating instructions. Processing can produce fumes, particles and heat. Confirm suitable extraction, enclosure controls and the operating procedure before running a job. Keep safety interlocks functional and monitor processing as instructed; do not assume an enclosure alone resolves every hazard.
Do not process an unknown plastic just because a similar-looking sample worked previously. Obtain its composition and confirm compatibility. Cleaning and maintenance also affect consistency, so keep optics and the working area in the condition specified by the manufacturer.
Frequently Asked Questions
For more introductory questions, visit Good-Laser's laser engraving FAQ.
Does laser engraving remove material?
In the strict technical sense, engraving removes material and creates a recessed feature. The broader commercial term can also cover visible surface effects. When ordering a sample, describe both appearance and depth so the supplier can distinguish a contrast mark from a measurable engraving.
How does laser engraving work on wood?
The focused beam changes the wood locally through heat, creating contrast and potentially removing material. Grain, species, finish and exposure influence the appearance. Test the same blank you intend to use in production, and inspect fine details after following the recommended cleaning procedure.
Can a laser engraver work on metal?
Suitable systems can mark or engrave compatible metals, but the source and configuration matter. Specify the alloy, coating, finish and required depth. A successful mark on coated metal does not establish the same capability on bare metal. Ask for a sample on the exact material.
Can the same machine engrave and cut?
Some machines perform both operations on compatible materials. Engraving controls a surface effect; cutting must pass through the thickness. Confirm each operation separately, including finish and processing time. A machine capable of metal surface marking is not necessarily capable of cutting metal sheet.
How long does laser engraving take?
Time depends on the processed area, fill density, detail, settings and pass count. Loading, alignment, inspection and cleaning also contribute to batch time. Compare a complete representative job rather than calculating production capacity from the machine's maximum advertised motion speed.
Do I need special software for laser engraving?
You need a workflow that prepares the design and assigns processing instructions to the machine. Graphics software may create the artwork, while a compatible laser program manages the job. Confirm supported formats, controller compatibility and licensing for the exact equipment before choosing software.
How do I know which Good-Laser machine to choose?
Start with the material, largest part, artwork and required finish. Then define expected batch quantity and handling needs. Compare sample results and complete-job time across suitable configurations. This gives a more useful selection basis than choosing solely by source type or wattage.
Turn Your Design into a Tested Engraving Process
The best next step is to evaluate your actual product. Share the material and coating, artwork, part dimensions, required contrast or depth, expected quantity and delivery country. Good-Laser's laser engraving samples and testing service provides a starting point for discussing that evaluation.
Whether you are considering Light Blue 530 for craft work, Light 530 for non-metal projects or Mark M20 for metal marking, ask Good-Laser for a model recommendation and quotation based on the result you need. Request the proposed configuration and sample outcome together, so the equipment decision follows your application.